Picture Book: Layout Process + Storyboards
My “Layout Process” for illustrating a picture book
I’ve outlined my process below, sampling from various projects I’ve worked on.
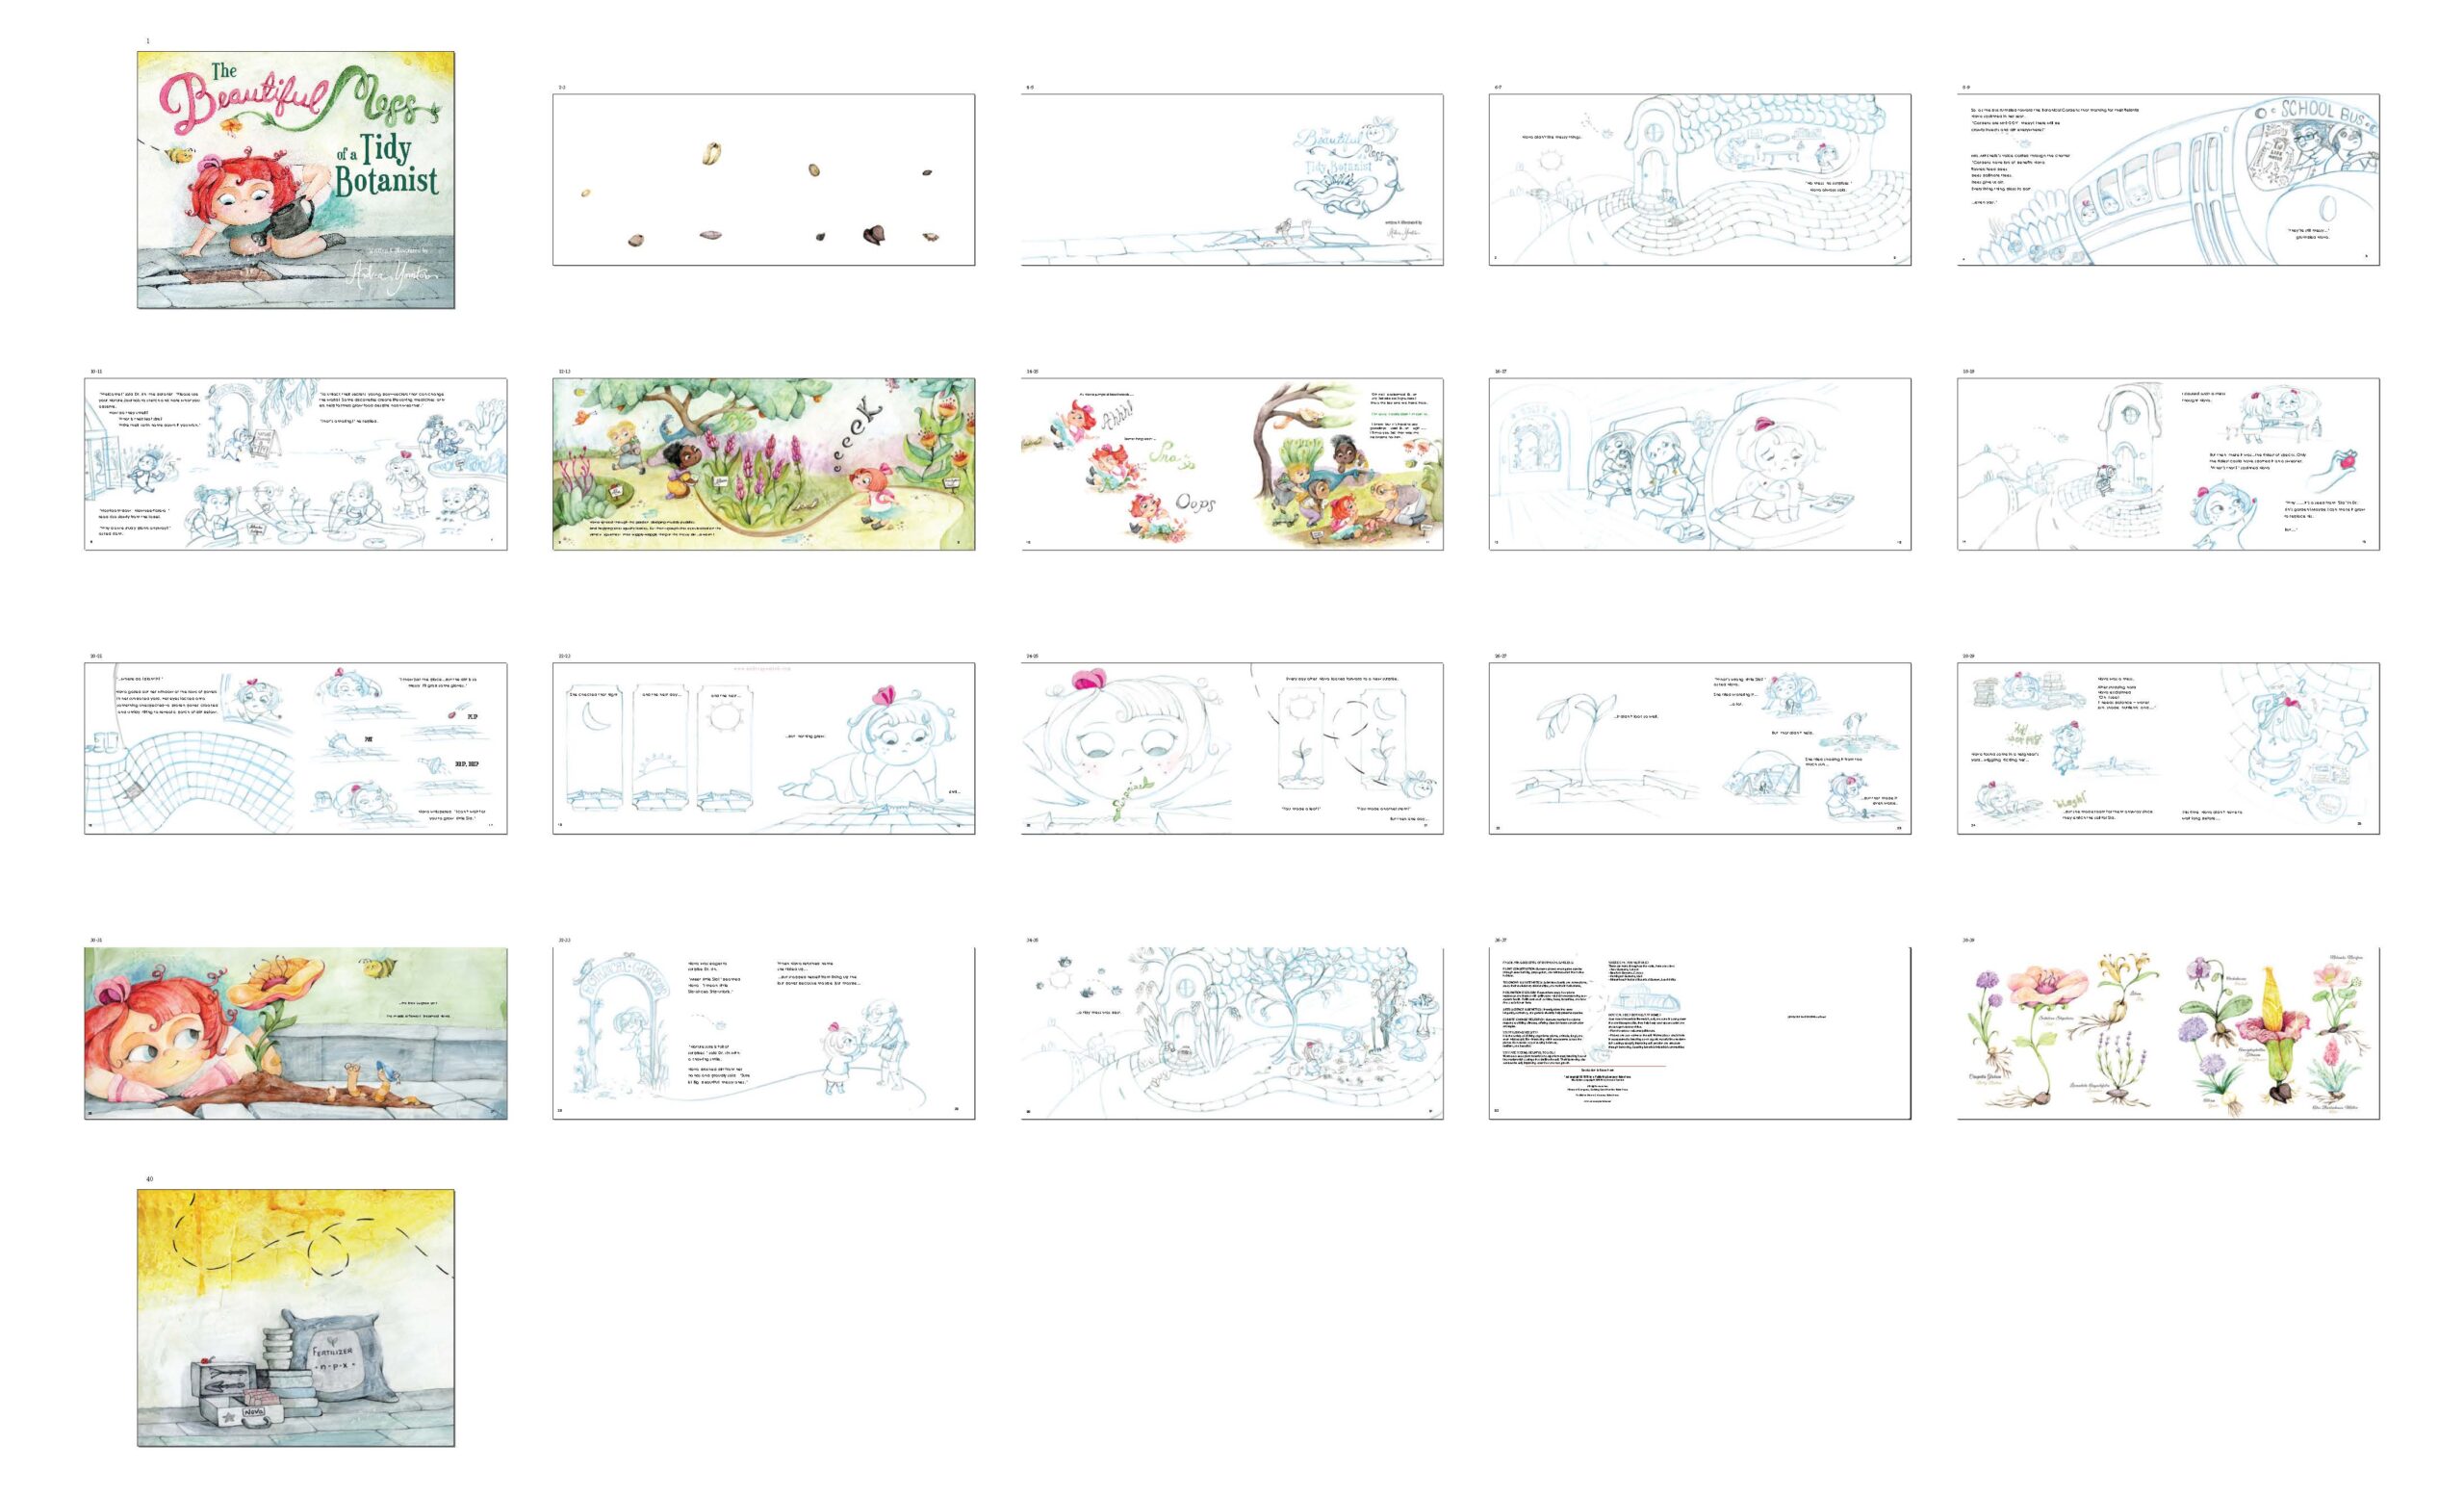
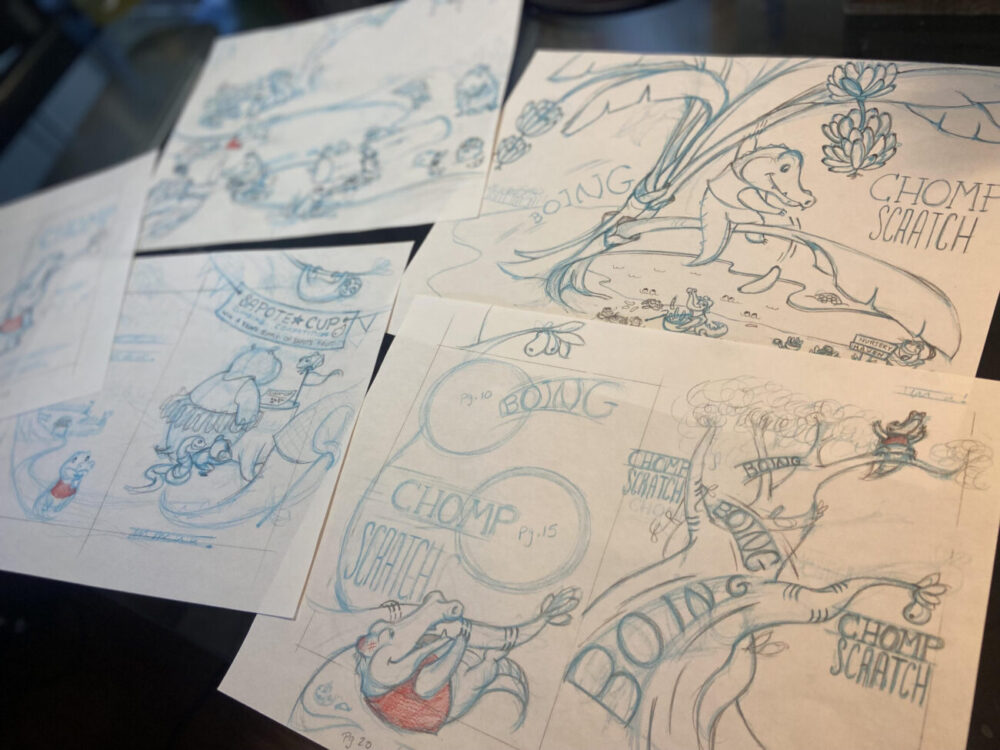
Here is a flipbook showing a sequence of layout sketches for a PB. These are just a few examples pulled from my dummy The Beautiful Mess of a Tidy Botanist
Step 01: Manuscript to Thumbnails
POINT 02: Doing many versions.
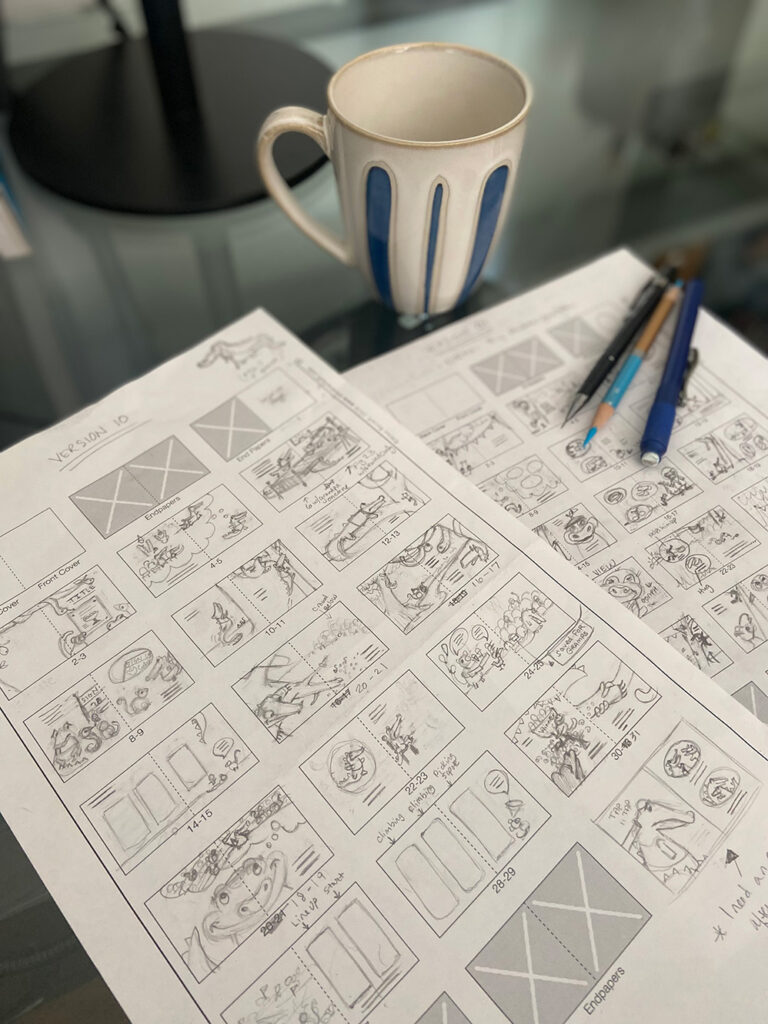
My mini sketches soon pour over into thumbnails, so I print out many picture book thumbnail templates courtesy of Debbie Ridpath Ohi. Finding the best way to tell the story requires the most mental energy for me, so I pour myself a nice cup of coffee first. Then, I find myself a quiet corner in the house with no distractions, and sketch out my first pass. Afterwards, I put my first version aside and sketch new versions. Eventually, I cherry-pick my favorite ideas.
POINT 01: Paginate the Manuscript
I play with pagination in Microsoft Word. This takes out the guesswork when I get to the thumbnails and familiarizes me with the rhythm of the text. Then, I print it out and do small sketches in the margins so I can get my first gut reaction for visuals.
POINT 03: Deciding Orientation
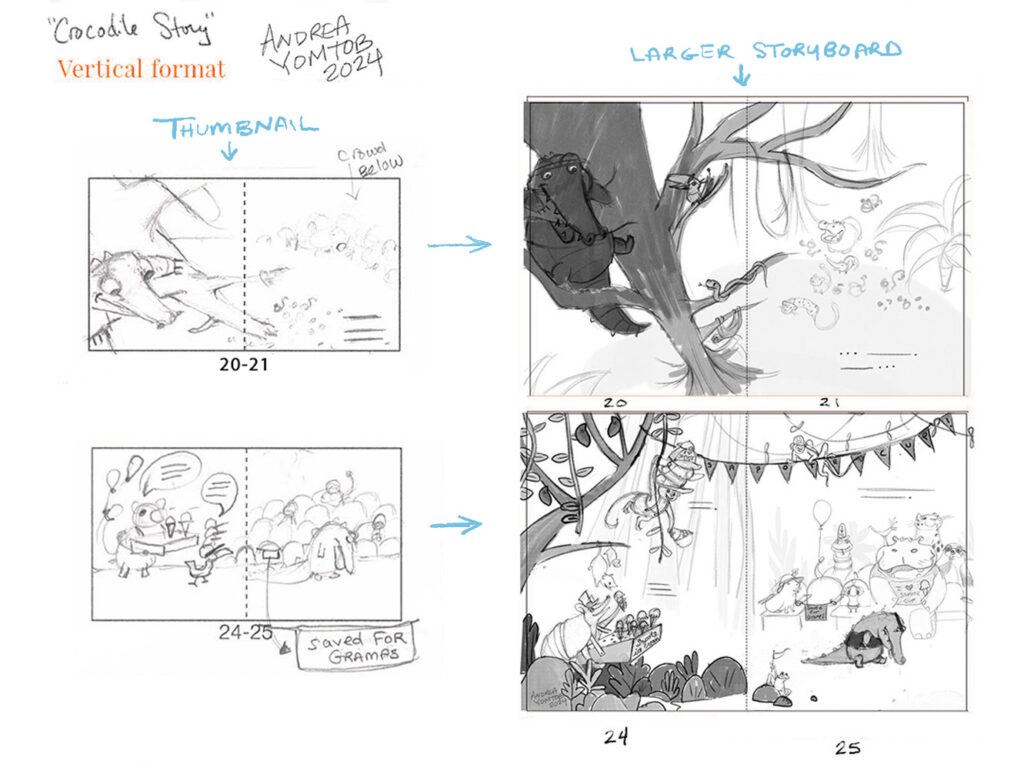
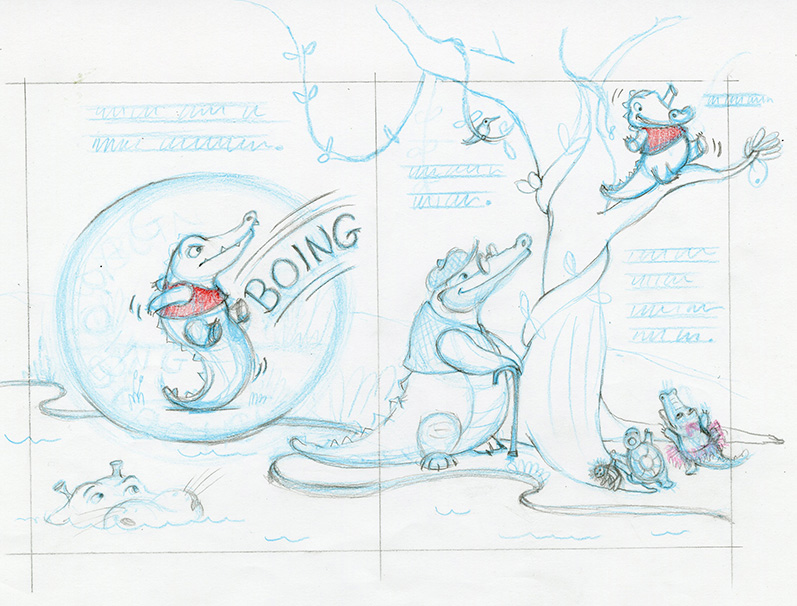
Choosing Vertical, Horizontal, or Square format is based on the story. When boarding the book about Curly, the crocodile who climbs trees, the vertical format made the most sense since the trees were tall. When boarding the book about Nova, the tidy, red-haired botanist, I felt that either a vertical or horizontal format could work, but ultimately picked horizontal because seeing the beautiful garden at the end looked more expansive horizontally.
Step 02: Character Development PLUS Larger Layouts
POINT 01: Staying Creative and Loose
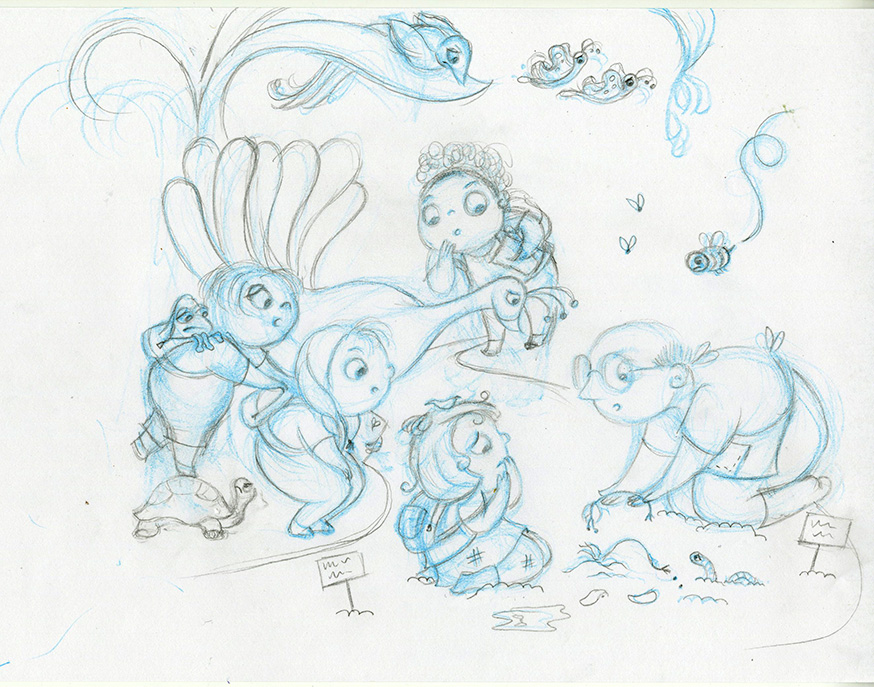
My thumbnails are like cliff notes -quick scribbles in some cases (as you can see in the picture above). This helps me focus on telling the story instead of worrying about the artwork. I maintain this headspace when I enlarge them. Keeping in mind a favorite quote I heard from Nina Rycroft, “If story is King, then clarity is Queen.”
POINT 02: Befriending the characters
I like to get inside the head of the characters during the thumbnail stage. What do they like to eat for lunch? Do they have a short temper when they don’t get what they want? These questions probably sound silly, but it helps me capture their personality and emotions.
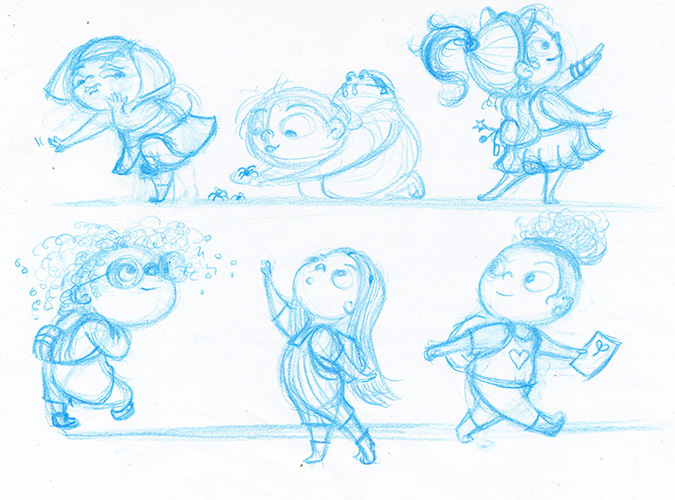
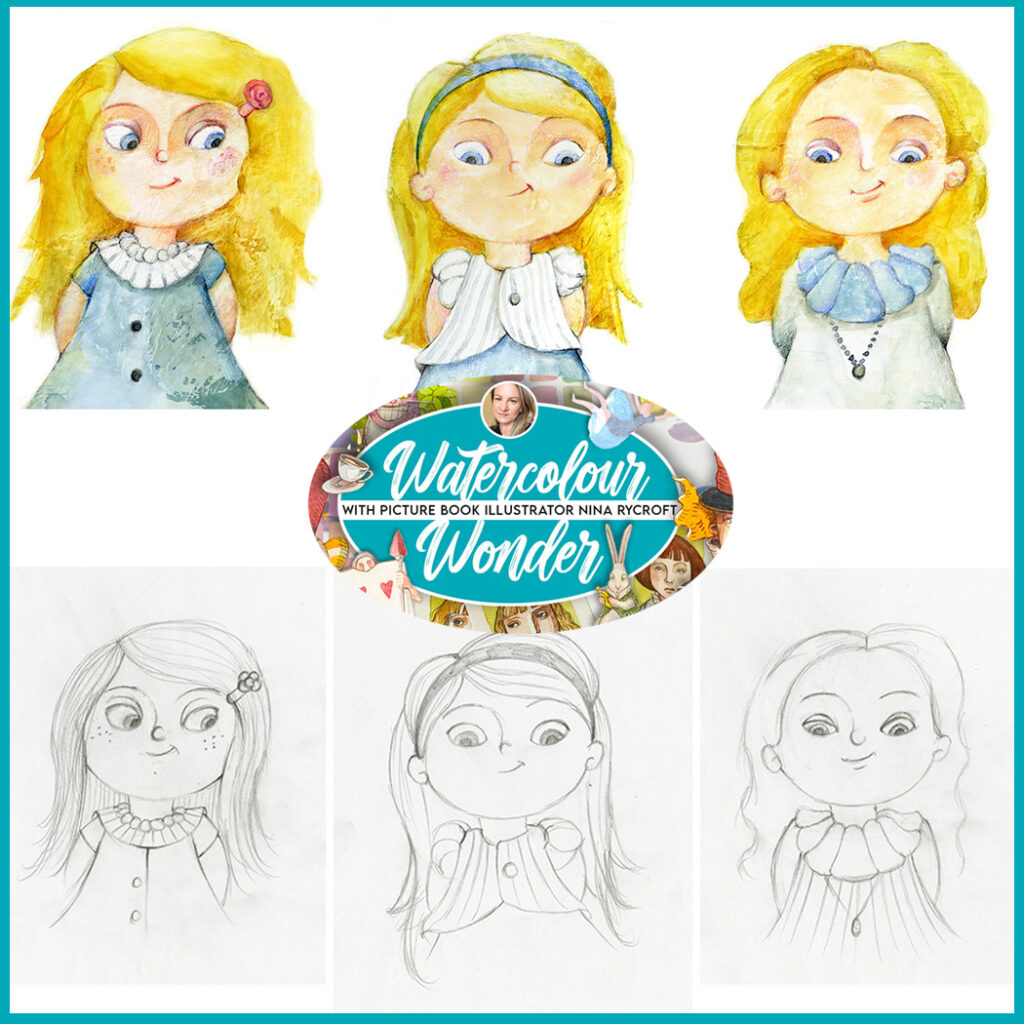
POINT 03: Character Design
I do many sketches of the characters in various poses, play with their outfits, hair, and style. This is a lot of fun for me.
POINT 04: Simplify
Then, I clean up my character designs and sketches, always looking for ways to simplify shapes, especially where my characters fit into their environment and around the text. I print out larger layout templates to help with this step, again courtesy of Debbie Ridpath Ohi.
Step 03: Cleaning up Storyboards
POINT 01: Character Interaction & Text
Once the big shapes are clear and I’ve given enough breathing room for text, I add details that kids can have fun looking at. For instance, I might add small side characters interacting with one another and funny expressions. Or place objects in their environment that emphasize their interests. I love putting detail in the art for readers/kids to find.
POINT 02: Final Review!
I scan my cleaned-up storyboards into Photoshop and replace my earlier sketches in my 32-page thumbnail template. I reduce the viewing size and assess for any revisions.
That’s It!
So there you have it! Those are my basic steps when initially laying out a picture book. There are a lot of twists and turns that happen along the way that add to this process, but that’s part of the fun!
Layout Examples
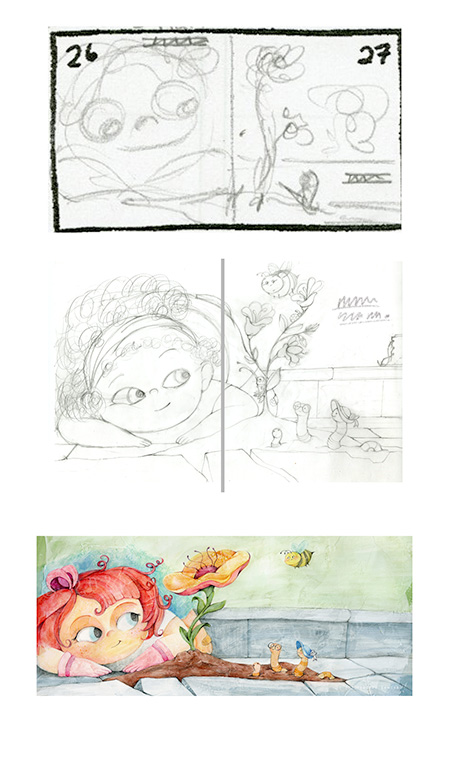
EXAMPLE 01: Spread 26-27
The images below show the progression from thumbnail to final painted illustration in PB Dummy: The Beautiful Mess of a Tidy Botanist. The character and flower design changed over the course of making the book, but the general composition remained the same.
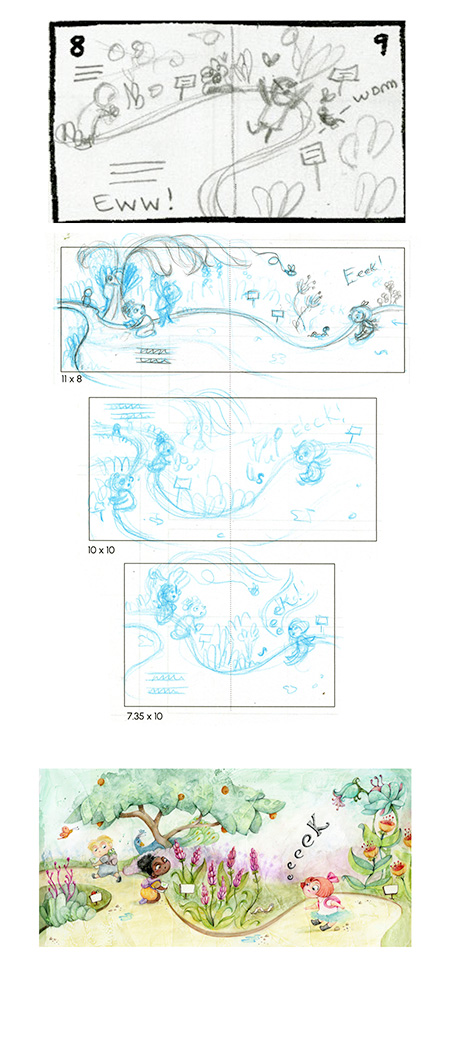
EXAMPLE 02: Spread 08-09
The sketches below show the rough thumbnail, then a few tests with different horizontal, vertical, and square layouts. The last image is the final color.
Want to see my process from Final Sketch to Finished Artwork?
You can check out my hand-painted process HERE!
LET’S CONNECT!
I look forward to hearing from you. Email: [email protected]
Visit my CONTACT PAGE